Design and manufacture your own tessellating design to eliminate the need to re-roll your cookie dough.

If you've ever made sugar or gingerbread cutout cookies, you'll remember starting out using all the fun, big cookie cutters when there was plenty of dough. When I did this with my grandma, as we re-rolled the cookie dough and started running low, we ended up cutting the cookies into sad, deformed squares since the scraps couldn't form full shapes any longer.
The solution to using up those scraps without forming new ones? DIY tessellating cookie cutters! Tessellations are when shapes fit into each other perfectly when patterned in certain orientations. As I found out from my childhood, squares are one of those shapes! You can make a sheet of squares with no waste. But who wants to eat a gingerbread square? Fortunately, there are infinite variations that you can make based on "base shapes" that tessellate.
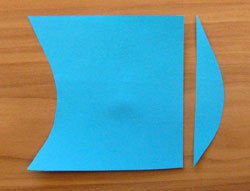
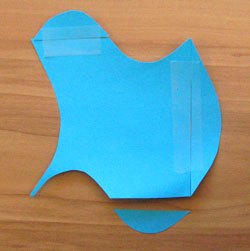
The easiest base shape is a square (or diamond), which is what I used to create the maple leaves. Using a computer or simply a piece of paper and scissors, you can start customizing these shapes. On a piece of square paper, cut a shape into the left side. Now tape that cutout onto the right side. Do the same on the top and bottom. For more detailed tutorials, click on the pictures below. That's it! You have a tessellating shape.
That being said, I doubt this shape looks very exciting. As if you're looking at clouds, try to find something that your shape kind of looks like. Once you have an idea, try tweaking your design to look more like that object. If you are like me and prefer to change your mind a ton with no consequences, you can try designing these on the computer.
No fancy software is necessary for this: I admittedly used MS paint since it had all the basic functions I needed. I drew a square and rotated it 45 degrees to start me out with a diamond. I drew a test cutout on one edge of the diamond, and copy/pasted it to the opposite, parallel side. I played with this design for hours before I was happy, but you can do this in no time if you don't care for a super detailed design. Here is my version on MS paint with additional details.

While a square is the most basic shape for tessellations, you can also look at triangles, which can be patterned by having one right-side-up shape between two upside-down versions of it. Or, if you are bored by the idea of one, single repetitive shape, you can choose two different shapes that fit together in a continuous pattern. Think about a soccer ball. The hexagons and pentagons fit together to make a complete sheet. If you altered those accordingly, you could have two unique custom cookie cutters.
Once you have your design, it's time to transfer it to CAD software for 3D Printing. I will show you how to create it in Solidworks. I actually made the maple leaf design in Inventor, so if you have questions about either of these softwares, send me a chat! I currently do not have images for this tutorial, but they will be coming soon.
If you don't have access to rapid prototyping machines, there are plenty of online tutorials that show you to unroll an aluminum can or use foil to make your shapes. These won't be as accurate as 3D printed designs, but are a good alternative nonetheless.
For those of you using 3D printers, if you created your design on paper, scan or take a picture of it to upload to your computer. If you sketched your design on the computer, export it to a .JPG format.
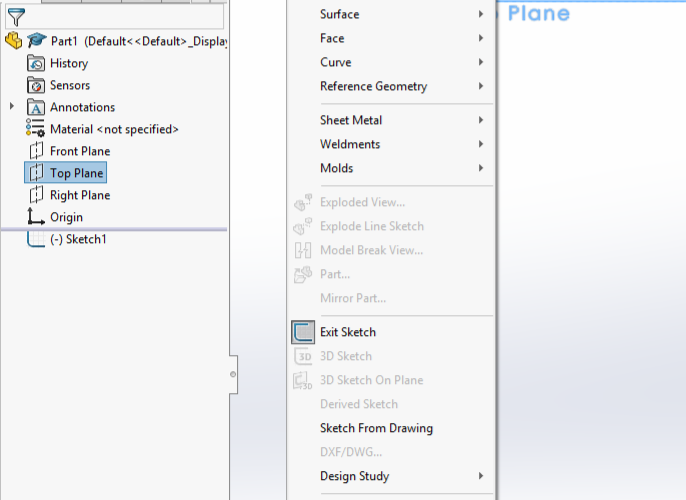
Use the slideshow on the left for visual instructions. On Solidworks, create a 2D sketch on the top plane. Make sure your units at the bottom say IPS, or select it to change.
Import a file by clicking Insert>Object>Create from file>Browse, selecting your image, and hitting OK. Use the scale tool to resize your picture to the desired size of your final cookie cutter.
Next, draw the original base shape directly onto the imported picture. Using lines and curves, trace the design along one side of the base shape. As an example, I drew a quick tesselation. Copy/paste the lines and drag it to the appropriate location on the other side of the shape by lining up the original point with the new one, as shown by the dotted line below. Repeat for all the sides that need altering. Use the trim tool to remove excess lines. If you plan to add details other than an outline, you will add them in a later sketch.

Now use the offset tool to give your cookie cutter thickness. You want to make sure it is thin enough to cut the dough, but not too thin to break.
Exit sketch. In the design tree, select your sketch, and click the Boss Extrude feature. Click on the relevant section (the thin area between the lines), and select a depth. This will be the height of your cookie cutter, which you want to be tall enough to fit comfortably in your hand. Hit the check mark.
If you are happy with your contoured cookie cutter, you are all ready to print! You can skip the next step.
To add details, create a new sketch on the plane on top of your cookie cutter. I free-handed this part for my maple leaf details, but if you'd prefer to sketch on top of another image, you can use the same steps for importing. Use the same steps as before to offset your design, and extrude it to a small fraction of an inch shorter than your original height, so the cutter only makes a dent in the dough instead of cutting clean through. If your sketch extrudes in the wrong direction as shown above, use the reverse function to fix it. (Note: if your details are "floating" in the middle of your shape, you will have to create a third sketch that forms a ceiling on top of the cookie cutter.)
Once you are finished, export your part to a .stl file. When importing your file to a software compatible with a 3D Printer, make sure the cookie cutter is oriented so that the top plane from your CAD model is the same as the top plane in the print. However, if you added details that needed a ceiling, you actually want to the top plane from CAD to become the bottom plane, so the ceiling becomes the floor. Every 3D print software is different, so if you have technical questions beyond this step, feel free to send me a message.
This was my finished product!

Finally, it's time to make your cookies! Use a recipe for sugar or gingerbread cutout cookies that don't rise, and follow the instructions. Make sure to chill the dough as 3D Printed cookie cutters tend to stick to the dough more easily than metal ones. As always, if you have any questions, feel free to send me a message!


Comments